Saturday, 28 May 2011

Todays layout


This is todays crafty effort as I have decided to do more scrapbooking as my mountain of cards is ridiculous at the moment!

So the photos were ones I took of M and V messing around a few weeks ago at a restaurant pulling faces for the camera.  The layout is a variation of a sketch on Kirsty Wiseman's blog she used for her Wendesday crop which unfortunately this week I couldn't get to, but thought better late than never to join in. 

So I chose the papers which I thought gave a nice mix of coordination and contrast, an oatmeal 12x12, then some nitwit linen effect green and some textured dark plum, some Basic Grey stripey 12 x 12 and some lace and velvet type ribbon.  Chose to do a bit of rough and ready edging to the plum cardstock which was inspired by Kirsty's layout.  As I don't have any doilies (this needs rectifying though!) I went for punching the edge of the cream linen paper from Nitwit and then adding a lacy ruffle ribbon.  As the photos I had didn't quite work the way round of the sketch I had to rotate it 90 degrees.  Then added the copper mist spray and some droplets of the gold pearl mica in the bottom right hand corner.  Finally added the embellishments which were mainly from a kit I must have bought about 4 years ago and never even opened (the things you find when you look through your stash huh!).  So there are a mixture of chipboard stickers with family related sentiments.  Oh and added the stamped sentiments down the left hand side too.  And the little tags that are making memories ones I sprayed with the copper mist and then added the ribbon as well as the edge of the stripey paper with the ribbon too!  Oh and some very cute tiny little pink buttons too! 

So amazed with myself that I managed to finish this off all in one crafting session, especially as it was a session I was looking after M in - for once she didn't want to "add" to my creation.

Anyways tonight hubby dearest has friends here to watch the football and all I know is at least 1 goal has gone the way he wants as I have cocooned myself on the bed to watch pirates of the carribbean (getting myself ready to watch it next week!) and to play with some digi scrapping so may well post another few posts later on if I feel ok with my creations.  Alternatively head over to daisytrail and look out for CatieCuddles creations over there too!

Happy crafting all!


More cards

So here are the other cards I've made recently just for fun!

Debbie Moore CD ROM bought last year which is a bit christmassy but this image isn't so bad for other times - quite sophisticated I think - some glitzy glitter gold card for the backing added that touch of luxury.


A topper from a CraftsUPrint freebie in a magazine - this was the best of the ones in the set (the others were most definately not my style!).  Cut this up however as the card it would have made was huge - the mounted it on the glitzy gold glitter card and then some decorative gold paper from the Debbie Moore cd rom.

From the same topper as the previous card - this was one of the elements - same paper background too - added some gold glitter to the paper too.

 Some more freebies being used up.  This time used freebie papers from a magazine and some freebie ribbon from an easter egg.  Finally topped it with a stamp from the Papermania kit of the teapot and the sentiment of Afternoon tea.  Although I love these stamps they are not the easiest for me to work out how to use in the compositions - but quite pleased with this.

Completely different again - this time the Daisy and Dandelion stamps from a mag, and freebie papers again and sentiment from another frrebie set.  So so cute!  Also loved the colouring I did on this little puddy cat!

More freebie papers and the Papermania stamps.  Used my stampin up inks here and quite pleased with the look of these coloured inks i'm still not used to using.

Cutesy Polka Doodles stamp (freebie again) with the freebie papers but this time a paid for ribbon!  Unfortunately a little buckling on the paper but there you go you can't win them all!

Another cute colouring job and some assistance from Maya on the composition as she added the swirl and the flowers for me.  Quite like the little ribbon edges and the little backgroiund to the topper.

Really cute Pink Petticoat stamp - yes a freebie - and a mix of papers with some ribbon, lace, bling and the little frame (part of a kit I once bought).  I like this one lots!

Love this glittered paper but wasn't sure what to do with it.  In the end I went with a topper from a pack I set and a pink swirl and a little stamped sentiment.  Not 100% sure about this yet, but there we go!

This is from a set I got for a bargain price from C&C ages ago which has some nursery rhymes for pyrimage and backing papers etc.  So this one I went with Mary had a little lamb and made some matting and layering.  Added a criss cross brown ribbon and a pink button.  Then added some stamped butterflies for the other embellishment in the celery from stampin up.

Had a bit of a theme of the stamped butterflies from the stampin up set.  This was on the freebie papers and added the ribbon and the sentiment.

Some of the same freebie papers and this time a stamped MUM sentiment - just cos it looked like a mum type card.  Added the butterfly and the pearl to the edge of the sentiment.  Also punched the edges of the blue paper and mounted it on the brown card.  Also added the stripey ribbon which was a new purchase.

In a bid to remember there are males who also need cards did this little boy card which  I think is really cute!

Some more cute stamps and colouring.  Pink frame and flower seem to match nicely with the papers.

Love the little ribbons which used on this one.  Also the paper is embossed with the little circles - I can't wait till I can do this myself rather than have to wait till the odd pieces I pick up from here and there.  This time added with a subtle stamped image of the dog and some nice toppers.

Last one - some freebie papers contine and this time a slightly different layout to play with.

OK I'm tired now and if anyone got to the bottom of this post I'll be so pleased as it was a bit of a wade through.  Hopefully though it may have provided you with pleasure and you never know some inspiration - I certainly get some from others creative work so can only hope mine will provide some back.

So night night all - happy crafting to you all.


Friday, 27 May 2011

Finally got there ...

... after a lovely evening with a friend who is going through a very difficult time at the moment, which I hope has assisted her just by chewing the cud with me, I thought I would get online and update the blog with the latest of my creations - and before Diane says anything, I still haven't finished the M and V yet so not posting the C!


So where do I start ... well some more commissions I suppose!
The person who ordered the pearl card needed a golf card so this is what I created ... used craftartist to make up the picture from a few digi kits, the mats and layers and the little sentiment topper.  Then printed them all separately to do some decoupage.  Then added the digistamp from Bugaboostamps which I then coloured with promarkers.  Then mounted it all on the pearlescent blue card.  Finally added some stickers from a set of raised stickers from the Create and Craft range from Wilkinsons.  Don't like most of the stickers on the set, but some of them are fine as additions to these sort of cards and at the price you can't argue!  Overall - quite cute and hopefully fulfilled the purpose!

 Second was a request for a 2 year old boy card for a different work colleague.  (I am getting a bit bored with the requests for male cards - girls ones are so much more fun!).  But anyway - used some lovely checked paper, green ribbon and brown card to create some interesting layers for the stamped topper.  This is a Molly Blooms topper (freebie with a magazine months ago).  Coloured with promarkers with the themes of green and brown and blue.  Then added the lovely little chipboard number with it's topper.  Coloured this in brown and green to match with the colour scheme of the card.  Finally mounted it all on a light green tall thin card.
Well this is a slightly in progress version of the card - i forgot to photograph it when it was finished.  But you can see where I was going with it nonetheless - promise you it looked completely fab when it was finished!  So used some freebie papers to create the background, and put it onto peach pearlescent card.  Then put some lovely yellow gingham ribbon around the bottom and mounted three cute yellow buttons on it.  Then the picture is a stamped image I've used quite a lot (but can't remember the make of it!).  Mounted it onto green and then coloured with promarkers and added the yellow ribbon with the little bow/knot.  Anyway the theme for this card was a 3 year old who loves sunflowers and helping on the allotment.  So this is the reason for the image of a little girl gardening.  Now the added features were a number 3, the name of child and the main thing that it's a shame I won't be able to show you which was the very cute sunflower stickers I bought especially for it!  So so so cute!

So those are the latest commissions ... there are more to come but haven't loaded all the pictures yet so will put them in a different post!

Thursday, 26 May 2011

Long time, no blog!

but fear not ... I am back!

And also I have been doing some crafting in the meantime! 

I'll start with the challenge card made at Helen's class ... well part of it was but due to forgetting the punch needed for the sentiment the card was without the feature part so we took it home and were tasked with completing it.  I decided on the Debbie Moore ballerina stamp, in pumpkin ink with some bling orange gems and edged the stamped piece with the pumpkin.  Now I wonder what Diane has done with hers??? 

I know this is only a short post tonight ... there are plenty of pictures to blog but need to sign off to watch Fringe with the other half so this is a to be continued another night!

Happy crafting all!

Tuesday, 17 May 2011

Another commission!

So today someone popped into our office from another one for a meeting with a colleague who sits near me and happened to have a gander at my cards on display for sale and commissioned not one, but two cards!  The first one she needed straight away, so with great dismay I had to craft tonight!!!  :-) :-) :-)

So here is my commission for my first non friend or family customer!  A pearl wedding card.
I started with a pastel green pearlescent card blank (think this is about 5x5 inches).  I then added a strip of the muted floral paper (my favourite - Serif Picnic in the Park) then added a panel of cream pearlescent cardstock, which I punched using the Martha Stewart French Scroll as I thought it was quite a romantic edge.  Then I wrapped some beautiful flocked ribbon (I did buy this especially for the card and love love love it!).  On the pearlescent cream card I stamped the word Love twice (the other is at the bottom but you can't see it because of the reflection).  Then I created a tag and added the floral paper on top with the punched edge.  Then finally added the pearl and rose embellishment - again special purchase - and the two greeny pearl gems at the bottom.

Well I say finally in complete denial because I actually had to make this card twice.  The first time, I handwrote the names and the Pearl Wedding but it just looked wrong and not very professional.  So I took everything apart again, then typed the text onto another piece of the cream card using CraftArtist to get the positioning about right.  Then layered it all up again!  Such fun!

But the final result is great and I am really pleased with it, fingers crossed so will my customer tomorrow.

That's it for tonight - need to get myself off to bed.

Night night all!  Happy Crafting! 

Sunday, 15 May 2011

Serif - Picnic in the Park - amazing news!

I have just discovered that I own the digikit Picnic in the Park - how exciting!  So apparently the end of the freebie stash won't matter as if I want any of the papers I can just print them off!  Woo hoo!

Have also done a couple of quick layouts and uploaded them to Daisytrail - so please check them out if you are interested... apparently there were more football programmes to watch so it was a good excuse especially as I discovered my lovely lovely digikit!

Grown up girl and Cycling to the Park

Now really will stop posting blogs and switch the laptop off to go to bed!

Happy crafting!

My craft room! Well sort of!

Decided to let hubby finish watching the footie and so instead thought I was overdue posting the pictures of my craft room.

Well not exactly a craft room as it is the dining room table that has to be cleared to eat at everyday so it is a collection of boxes and a wheely set of drawers that live in a cupboard under the stairs which has to be shared with ironing boards and toolkits and vacuum cleaner and other random household things I have no desire for but apparently require! 

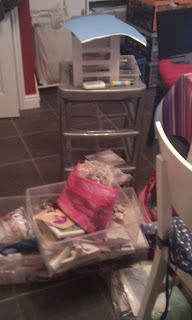
So here are some pictures of my craft space mid session - as you will see I am not exactly a tidy crafter so most sessions are accompanied with much humphing when I can't find what I am looking for!


I don't usually have the laptop on the table too - but this was as I had finished the page I did whilst following Kirsty Wiseman's live crop.  You will note that there is a cold cup of coffee on the table - this is normal for me - I get so engrossed in what I am doing I forget all about it.  There is also a massive stash of magazines on the side which is not normal either but I have now dug them all out ready to check through in case there is anything I have missed in terms of freebies to use up.  Getting a little determined to make the most of the huge amount I spend on these magazines and so also going to start cutting out 'inspiration' photos and putting into a book as they are now taking up too much space and some have nothing I am interested in, save one or two cards.

Next to my chair sits the wheely drawers - emptied out!  On top is my tool box which stores the small embellishments, some pens and some small inks etc.  Princess M loves delving into this.  The drawers start with some order, and end with being a mish mash that requires a good sort out at least once every three sessions.  There is a mixture of inks and papers and ribbons and tools and punches and basically loads of bits and bobs in here.

A closer look also shows my recent purchase of a messenger bag to take to Helen's class which also houses the Ultimate Pro, my heat tool, promarkers and other random things I shove into it when I can't be bothered to tidy up properly.  And my rubbish bin of a fashion.  This is a tip I've got from another class I go to - masking tape a carrier bag to the table for ease of use!  I manage to get more bits in this than I did using the paper bin I used to use!  Much easier!

Now what isn't captured is the cupboard itself which has another 4 shoe boxes full of stamps, finished cards, christmas stash - i separated this out in a moment of sensibleness a while ago - it doesn't happen often - envelopes and my leftover stash of paper - I can't bear to throw them away - even though I struggle to use them - but it's easy for Princess M to delve into here instead of touching the 'expensive' or 'pristene' papers etc.  I also have three scrapbook albums (unfinished) to store in the cupbaord and some painting supplies too!

So for those of you with craft rooms - please understand my jealousy - and why I sometimes can't craft even though I really really want to.  We eat at the table every meal - so if mid craft it's tough - I have to clear away! 

Anyway - I really must finish now and work out if I have enough time to do a digiscrap before the footie finishes as given up on the idea of watching decent tv for tonight!

Catch up ...

... so whilst I have been away from the laptop and not had a chance to post, I have managed to squeeze in some crafting.  There have been a few card making sessions and some other exciting experiments... but more on that later.

Here we go with a few cards I've made.

So the first few are using the gorgeous Picnic in the Park papers from Serif - I've nearly finished the pack now - just so cute and very me at the moment.  First is a lovely landscape card, with the rabbit stamp I've used quite a few times now that really reminds me of Peter Rabbit.  Finished with the brown button and cream ribbon tied through and made into a cute bow.  Coloured the image with my faithful promarkers.

Next up is more of the same papers, but green toned, layered with some lace and then my new clarity stamp from the club.  Coloured in and a sentiment stamped.  Finished with some lemon rosebuds from the deadly flower sets (see a previous blog!).  Very pleased with this cute card and loving the new stamp!


Debbie Moore stamps and more of the same papers!


Finally - some different papers I hear you say!  Well another freebie pack with the magazines that are definitely not free!  Debbie Moore stamp I have used before, stamped onto clarity card so nice and shiny.  Made strips of from the stripy paper to cross over and then added the lilac deadly rosebuds in a little bunch to finish off.  Image coloured with promarkers again!

Some different cards in style now.  Inspired by the class Helen did last month I found some lovely black and cream card in my stash that has a lovely sheen to it and teamed it with the red.  Stamped in black the dandelion stamps from Personal Impressions and added some glitter to them. The horizontal panel then added the cream ribbon.  Also added three red gems for additional bling and hey presto!

 Similar to the above but used a small piece of green with a punched edge to mount the deadly cream roses and added a black ribbon sprayed with pearlescent mica spray.
 And using up the gorgeous paper tested my construction skills and made this card that sort of flips around - can't remember the name of the template.  Used the same dandelion stamp and played with only inking the head too.  Particularly like the little strips I put on this - quite designer I thought!
Unfortunately no picture of the other side - but it had another dandelion to match and then a panel for writing on it!

Not sure about this one as think I might have over embellished!  Some lovely papers though.  Papermania I think for the spotty one and central panel as double sided card, Pumpkin from Stampin Up for the orange border.  Punched with the Martha Stewart punch.  Flower from the Personal Impressions set like the dandelion above, then added some touches with a white marker pen and some glitter glue.  Then went a little OTT with the paper flowers, adding white pen and the buttons.  Finally some bling with the gems on the bottom too.

Back full circle it seems - some of the gorgeous picnic at the park papers again and a gingham bow.  Then found a cute sticker in my embellishment stash I haven't seen for ages and so here we go!  Simple but I think quite effective - but maybe it's just because I love these papers so much!
 A commission!  A retirement card for someone leaving social work - someone who definitely deserves to smile and enjoy their retirement!  The picture is from some 12x12 paper I have had for years from a kit I must have been sent when I used to get pink boxes from ScrapbookHouse.  I added some copper ink edging to distress it a little.  Mounted it on some red (from the Picnic in the Park pack - you must think I am on commission I mention it that often!) and some cream pearlescent card.  Wrapped an organza ribbon and added a knot.  Threaded a swirly paper clip thing (again I've had these years and never remember about them) and added three orange gems.  Finally mounted onto a DL brown pearlescent card from a pack bought especially to make the card.  Mum and Dad who wanted the card were pleased with it - so job done!

 Another departure from the norm.  Some floral paper - again a freebie pack from an expensive magazine - and some of the papermania card mentioned above and then stamped the Clarity naked tree with some spring type of leaves in the celery ink from stampin up.  Added some gems to the tree and then wrapped the organza ribbon and mounted the card on orange.
 Last but not least of the photos - Freebie papers and freebie stamps!  Stamps are the Pink Petticoat ones and paper is free with the same magazine - I bought so many last week I can't remember which one!  paper pieced the flower on the stamp and coloured with promarkers.  added the bow from some ribbon bought in The Works as part of a £1 pack.  Made the paper ribbon from the freebie paper with the Martha Stewart punch, added the flowery sequins I reacquainted myself with when scrapping the other night.  Cute card methinks!

OK so thats it for the card making - but what else have I been up to.  Well at the NEC I bought three mdf letters from the WOW stand, one for C, V and M.  Well I've struggled then to get the courage up to do anything with them.  About 2 weeks ago I decided I ought to do something - so started with a coat of creamy brown acrylic on the C.  Since then I've gone to town with ripped papers (you'll never guess which paper stack I've been using - oh yes the gorgeous Serif Picnic in the Park ones!), more paint, stamps, golden glaze, PVA, buttons, wooden flowers and pearls.  And today I finished the C.  No picture as yet as waiting for the varnish to finish drying but will post really soon I promise.  I was so inspired today I started on the M too.  Princess M of course required a different style and colour scheme - as indeed will Hubby V, so hers is a pretty pretty one and not far off being finished, where is mine is more in keeping with altered art I suppose.  Have to work out what on earth to do with hubby V's now ... sure the inspiration will be just round the corner though!  Such fun!

So there you go ... a very new departure for me ... looking forward to sharing it with you soon to see what you think ... but now must sign off so can get hubby V to turn football off the tv!

Happy crafting all - night night!

Tuesday, 3 May 2011

Bank Holiday Morning Craftathon!


So I got some craft time in on Monday afternoon and evening under the pretext of a thank you card for my parents for all the work they did in our garden for the previous few days ... any excuse huh!

So here is the card, made from some free papers and elements- from a magazine - nice!  Teamed with a punched edge from a new Martha Stewart punch - so much for no craft spending hey and some cute paper flowers I'd bought off ebay a while ago.  V cute me thinks!

Well after this there was no stopping me ...

Using up the freebie papers and with some cute stamps I bought a while ago, added a punched border at the bottom layered up and then lemon grosgrain bow and ribbon.

Another one - very cute stamp here - loved the promarkers work I did on this and the cute stitching on the stamped panel.

This time a new stamp from a magazine matted and layered up with some cute floral paper and some more of the cute little paper flowers.  This time I used water colour pencils - although still not so comfortable about using them I was happy with the results for this.  Mainly I love the cute panda stamp!

Another stamp from the same freebie set from the magazine, but this time the giraffe.  Coloured more confidently with the promarkers and layered up with the pretty floral paper and coordinating colours.  Then added the flower embellishments including brads and the roses etc and the ribbon embellishment.

Another panel of the floral paper, this time a puppy dog stamp and decided to test my construction skills a little and made a stepper card.  Added the ribbon and the beautiful orange paper flower and then cut out some leaf shapes.
Then moved onto some slightly different designs!

Freebie paper pack (Pinic Time - Serif) came with another magazine - I really spend too much money on them!  Anyways this was following a sketch from the magazine for some inspiration but then used the panel from the little easter cart we made, and then added the button - recycling in action!


Using the paper pack from the magazine again and this time some lace, a punched border and a stamped image from the Debbie Moore set I bought at the NEC.  Finally added some paper flowers and some glitter and bling.  But focus on the stamped image - I didn't colour it - well except the skin - instead I used the green and red papers from the pack and paper pieced and added the brown from the card in the background.  Really pleased with my hard work on this - it was hard work cutting it all out so finely - it was lovely.

Another use of the stamp and some of the papers from the pack - this time added a gingham ribbon and a little bit of punched paper to make a feature of the ribbon.

Again more of the paper and a different Debbie Moore stamp from the same kit.  I thought the summer papers - which look a little dark on these pictures - contrasted nicely with the stamp of the rainy image - typical English summer huh!  glittered the water droplets and added some gems on the right hand side.

And last but not least - same papers with some green gems and a Barbara Grey Clarity stamp image - It's a naked tree and some blossom type leaves and then used a white marker pen to add the blossom effect and the stitching effect.

This is it!  What an afternoon and evening - thoroughly enjoyed the craft time!