Tuesday 29 March 2011

Todays creations

 Well a mix of todays and yesterdays really! 

Card 1:  Used the birch trees stamps on some card, then masked off the trees and the moon shape and created the background with the big and juicy Happy Birthday ink pad.  Then mounted it onto the Rich Razzleberry card from Stampin up with the edge cut with Martha Stewart punch.  Then added the silver ribbon, and the gems before mounting on the lilac pearlescent card.  Only problem is that there are some small smudges as I was too impatient for the images to dry before I started with the brayer!


Card 2: This was just a play with the tree mask I bought at the NEC and so I used the brayer to create the background with the Big and Juicy ink pad.  Then used one of the Debbie Moore stamps (also from the NEC) to stamp the girl in the rain.  Coloured the image with promarkers and then layered up on a pale pink stripe paper and wrapped a pale turqouise sparkly ribbon with some pearl tops.  Finally onto the lilac card and finished!


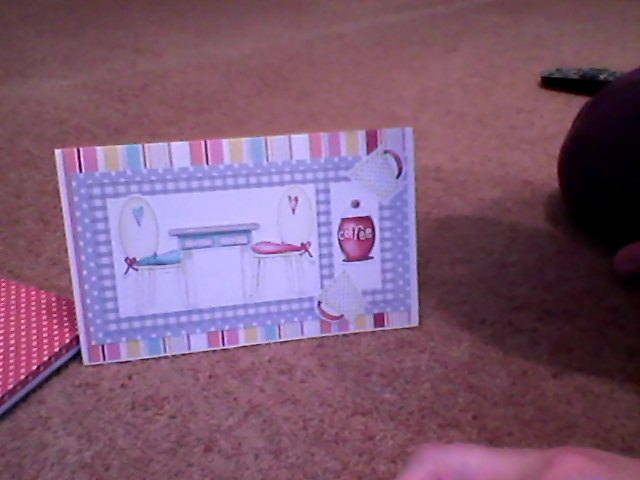
Card 3: This was using some freebie papers from a magazine, layered up with some pretty pink paper flowers and some pearls to create a cute easel card.


Card 4: The masterpiece!
Created a water effect for the water, then masked off the moon and inked up the sky.  Used the naked tree and some spring looking leaves for the outside of the background.  Then edged with the black pen in a squiggly line.  Then layered up on Stampin Up papers and card in a mix of Baja Breeze and Rich Razzleberry.  Embellished with ribbon and buttons and a strip of punched paper for the bottom.

So these are todays pieces of work! Printed off some designs for layering up another day when I get around to cutting them out etc.

Monday 28 March 2011

First of the creations post NEC

So finally I got to play with my new bits and pieces and this is what I created!  Of course my first thing to try had to be my Barbara Grey stamps and play with the brayering techniques for creating some scenes.  I've done a few of these but only finished one card off.

So first I created the hills using some torn paper for the edges.  Then masked that off and did the sky with some sort of cloud effects.  Used my Stampin Up inks for this ... So celery and Baja Breeze.  Then with the Naked tree stamped the main tree and the branches coming down.  Then used one of the leaves stamps to build up the tree and edge as grass type of thing in the foreground.  Then hand drew a squiggly line around the frame the image.  Then I mounted the image onto the So celery patterned paper from Stampin Up, and the same with the Baja Breeze paper, leaving an edge to use my new Martha Stewart French Scroll punch.  I wrapped a patterned ribbon I got from the NEC around (think it was a stall selling Sizzix dies!) and mounted it all on the Old Olive card from Stampin Up.  Finally, layered some flowers up to create one flower embellishment in the corner of the image to finish it off!
On a final note - please see the lovely wall paper behind the card - that was my task last Friday - really pleased with it - so sorry for the dodgy photo but had to make do with the webcam and at least then my less crafty handiwork is also displayed in all it's glory!

Saturday 26 March 2011

NEC goodies!


So yesterday was my fun trip to the NEC!  5 hours later with aching legs and an empty purse I set off home with my goodies.  Unfortunately not yet had chance to play with anything (apart from a test of the Martha Stewart punch on some scrap paper!) as been decorating the bedroom and cleaning and tidying set for visitors this weekend. 

Fingers crossed that early next week I might get a full play!  Especially as I managed to pick up my Stampin Up stuff from Helen on the way home from the NEC - so very eager to try that out too!

But I haven't been completely bereft of craft as sat on the bed and cut out some decoupage sheets from a magazine.  Really not my style of thing - but they will do as children's card toppers I suppose and Princess M seems to enjoy layering up decoupage which means that there is a holiday activity for in a few weeks when she is off with the more naff of the images.  At least it made me feel better about not touching my new toys and bits and pieces.

Monday 21 March 2011

Digiscrap day

What lovely weather we had on saturday - perfect for an afternoon trip to the park and some interesting angle photos of M having fun.
After all the inky fingered crafting I've done recently it was time to get the laptop out and play digi scrapping for a little while and here is the result ...

Hope you like this - I am really pleased with it!


Thursday 17 March 2011

NEC next week

Just booked my ticket and train ticket for Hobbycrafts show at the NEC next week!  How exciting a craft week will I be having!  Firstly some time off work to play with existing toys and then secondly technique class with Helen to learn some new stuff and collect my stampin up order.  Then the next day off to the NEC to go and see all of the lovely stuff I'll be very tempted to come home with!  Must make sure I don't have too much money available to me as otherwise it'll be a very poor month!

Looking forward to all the inspiration and creations that come about from the crafty week - what a shame I also have to do some decorating some point too!

less than a week to go ...

... till I get to collect my stampin up stuff from Helen at the next class!  So excited!

Looking forward to a week with more craft next week!

Monday 14 March 2011

Mothers Day preparation

Well today I only made one card as I decided to make a mothers day card for my Mum-in-Law.  Watched some C&C whilst crafting away and this is what I created ...
Used some beautiful freebie papers to make the background squares and the matting and layering with some pink cardstock - again freebies!
Used the papermania stamps Summer Blooms Picnic set to create the swirly leaves in a light green ink to co-ordinate with the papers, and the hummingbird in pink.  Matched the stamps and stamped off the tag with the sentiment Just for You.  Added a bow and ribbon that came free on something else at Christmas.  And made yet another paper flower.  This time the glitter was slightly different for the flower using pink glitter and the quickie glue pen to add detail to the petals.  Then the pink coloured pearl for the flower centre.  Raised the tag sentiment slightly with foam pads to give dimension.  All in all - very pleased with this card.

Now off to sulk as my recorder didn't record all of Barbara Grey on C&C yesterday - hoping i might find it on catch up tv on line tomorrow when I get a moment.

Next crafting job is to make all the thank you cards with Princess M for her lovely presents!  But that will have to be some point later in the week!
So today is princess M's 5th birthday and I'm doing a quick blog catch up before I collect her from school.  In total I made her 2 cards because wasn't 100% convinced with the first one!  The 2nd one shown here however I was very pleased with indeed!
Used a stamp set I bought on Friday and coloured this in with Promarkers.  Stamped the rabbit and the toadstool images using a mask to get the rabbit in front of the toadstools.
Then used a papermania Picnic summer blooms set to get some trailing leaves from part of the swirly stamp.  Used a glittery ribbon to tie around, and then using a mix of pretty papers layered up the card.
Spot glittered the row of flowers down the left.  Then layered the flowers using pinks and oranges and heavily glittered them and added pearls to the centre.
Painted up the chipboard 5 in acrylic to get the right shade of pink.  Stamped the flower image all over in Stayzon, then added some glitter to some, and the 5 gems to the others.
 Inside created a panel from some pretty paper from my stash and then stamped the trailing leaves motif and the rabbit to carry on the theme and added the sentiment in pink before writing the message to our princess.

Crafting Friday afternoon!

So my afternoon off work started with a visit to a new craft shop - Jenny's craft shop in Widnes - as I was in Widnes for a meeting in the morning.  A few pounds lighter and off I set for home for a few hours of craft.

Inspired by one of the cards from the previous night I created one card, and the others were just my excuse to use my new purchases.

So first one -


Using the lovely stamp set I bought from Jenny's shop I stamped the girl on the pearlescent card and coloured using the promarkers - I'm definitely improving my colouring skills and quickly becoming addicted to promarkers.  Then layered up with the cute yellow and orange ribbon and then made up the flower from the stash I bought and inked it slightly to made the colour a little more toned.  Then cut the tag and added the sentiment.  Cute!


Second card was using the same stamp set as above, but with the boy image.  So used navy base card layered with a pale brown.  Stamped up the two white cards with the three images, and again my lovely promarkers.  Used a bright blue panel to link the two with some of the ribbon to tie in the orange in the pictures.  Finally, distressed the edges of the white panels and stamped the sentiment.  V cute - love the little boy image.

Third card  - used polka doodles stamps (free with a magazine) and the paper left from the first card to create this card.  made the front of the card slightly narrower than the back to be able to see the ribbon wrapped around.  Love the paper flowers - glittered this one slightly using glitter glus and used a pearl for the centre of the flower.  Think this will be for a friends 60th birthday that I am going to as it's nice, simple and effective.

Late in posting this as pc died on me - more posts to follow!

Thursday 10 March 2011

Crafty night at Sam's

So tonight I met some lovely people at Sam's card class in Thelwall and we did two lovely cards.

Firstly we did the trees card above.  This was heat embossing the three tree images onto green and cream in gold.  Adding the little gold gems randomly on the trees.  Heat embossing the sentiment in gold onto the brown and mat and layering it all up with a nice brown ribbon and some flowery paper.  Finally some nail head gems on the corner.  Nice, and simple!

Next up the Polka Doodles stamped image below!

Firstly - what an adorable image from Polka Doodles - and not like the normal from Polka Doodles - but still lovely!

Stamped the image twice onto the cream and then coloured using promarkers.  I'm still learning the colouring techniques but quite pleased with the job I did on this card. Mat and layered both images with the dark red.

Then created the trifold card with the image in the centre, and then stamped the sentiment on the inside cover with the mat of the patterned paper and then same shape and mat for the back panel.


Finally the other image onto the front of the card with the mat of the patterned paper - but not before affixing the gorgeous flowery organza ribbon to tie up the card.  Finishing touch of some orange bling to co-ordinate!  What a lovely little card.

Well done Sam for the projects and well done me on executing them pretty well - even if I say so myself!

To finish off my crafty night an email from Helen to let me know my Stampin Up order has arrived!  Woo hoo!  Just have to wait until the next class to get it though as too busy in the meantime to get there - ah well at least I have presents to look forward to!

Night all - happy crafting!


Sunday 6 March 2011

Saturday night crafting

With the arrival of a friends baby I was keen to immediately set to and do a card in honour of their new baby boy.  In addition I also needed to make a card for a colleague at work whom I often have a coffee with who is moving to another office.  For both I went to the Sundae of Seasons CD Rom from Polka Doodles.

I just love the baby images in this collection and really went to town on the stepper card.  It took ages to do this as I don't have a real template - just one I worked out for myself.  I also had to make a box as the design was so strange!  The box is not exactly sturdy etc, but it suffices for the moment!
 

I then used the cafe elements for the card for my work colleague, layered them up with the cute papers and some white card.  Not a difficult card and not technically challenging but cute nonetheless!


Will do some finishing touches tomorrow with a cute bow and some silvery bits or glitter - not yet decided but for tonight I am done!

Love Polkadoodles designs and can't wait to try out my promarkers with some of the images.  Tonight was not the night as was playing craft infront of the tv and not at the table for messy play!  Also think that some of this alongside my distress inks will be interesting.  But that's for another time.