Saturday, 28 April 2012

Stampin sisterhood challenge

There is a challenge sketch over at Stampin Sisterhood which I have attempted to follow although must admit I found it a challenge!

I stamped the base of the card with the snowflake stamp I've had for years from Inkadinkadoo in the pale pink ink. Then I layered up the Nitwit papers and added the panel and the Love sticker. I think this is so cute and although there is holly in the background I will probably not use it as a Christmas card, but instead send it as a card to a friend around winter time instead.


- Posted using BlogPress from my iPad

Mojo Monday inspired

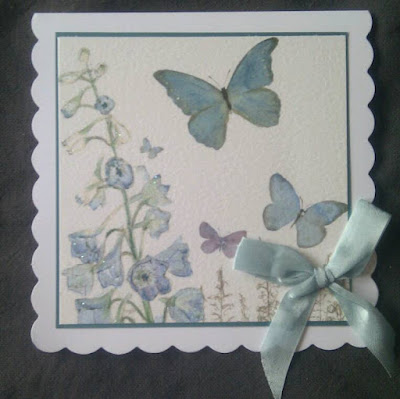
I have to make a card for one of my lovely work friends on behalf of the team for her birthday next week and was torn over what image to use but in the end I decided on the cute Lili of the valley image picking the roses as the recipient is in the garden every opportunity she has. I had water coloured the image with watercolour pencils.
I decided to follow the sketch from Mojo Monday though to finish the card off.
I chose the green card I had already cut and scored into a card blank and rounded the corners on and then made 12 one inch squares from the yellow (not sure what shade) Stampin Up patterned paper and decided to layer it up with the middle rows on one side of the paper and the top and bottom row with the polka dots.
Then I die cut the image using one of my scalloped circle dies and off set this slightly so that I had to trim the image.
Quite pleased with this although it's completely different with all those fiddly little squares. Enjoy!

Also entering the Pink Elephant Yellow challenge!

- Posted using BlogPress from my iPad

Thursday, 26 April 2012

Retro fairy

A quick card from me tonight made in response to a few challenges.

The image is from some stamped images I got with a magazine and spent a load of time colouring when I wasn't well but done very little with them since. This beautiful fairy is coloured with my promarkers and then I die cut this panel out and the layer underneath from some scraps.
Then I punch cut the bunting out of another scrap and then added a scrap of ribbon and the bling.
The sketch was from Retro sketches, the fairy is for craftycardmakers fantasy challenge and I also think the outdoor image is suitable for the garden gems challenge and their fairy nice challenge for the previous week at My time to craft.
Enjoy ... Of have some chill time with the hubby and watch some Grimm!
- Posted using BlogPress from my iPad

some cards I made

Not exactly an imaginative post title today!


This morning I decided to do a quick tidy of the pile on top of the fridge and found these cards I'd made up and forgotten about. They are the recycled card bits and pieces which I've chopped up a bit and then made new cards out of them.


Not much else to say except today I am tired and a bit on the stressed side of things... too much work, too little time, and trying to have a life in-between is difficult!


Ah well ... school run and grindstone to get to... see ya laters and thanks for popping by.


Published with Blogger-droid v2.0.4

Wednesday, 25 April 2012

WOYWW

A bit late with my post for this and even though I did do some crafting this evening I didn't remember it was Wednesday and take a pic of the actual desk so I thought I would share with you the pile on top of the cupboard I use for storing some craft stuff that we call the Fridge. Now before I go any further some people have thought this was actually the top of a fridge but it's not it's a proper cupboard it's just that we hate the door and the cupboard itself as we think it looks like a fridge in the corner of our family room but it's where some craft stuff lives and is almost continually topped with a pile of stuff.


So what can you see and what have I not put away? Well there are a couple of Christmas cards where glitter is drying so they are laid out to dry on top of vases and candles that are meant to be displayed artistically! Yeah right! There is a stash of craft magazines and some 8x8 card blanks I bought today for a few orders I need to do. Some stampin up stamp sets are also peeking out .. They should have been put away days ago. The jewellery tag punch ... Now that has no excuse for not being put away as I haven't used it since early last week? A mini canvas on an easel from the works I bought a few of a while ago and still not done anything with ... Still in their packaging. And there on the top is my she art journal.


This was a notebook I bought from Paperchase last year and created a little she art girl on it and finished it in March. I use this not for anything clever or big but to try and list the challenges i like to join in with and their criteria so I can create stuff without constantly referring back to the Internet so it's full of little sketches and dates and lists but is invaluable. Obviously it's also a pretty thing to look at although it rarely goes anywhere except on top of the 'fridge' and usually with a pen stuck in it!

Last thing to share ...


This is a carrier bag of the cards that used to live on the edge of our desks at work as a box of ready made cards for sale but now we have moved to a clear desk policy and there is nowhere to put them on display. Do any of my local friends who maybe peruse my blog have an office where they fancy just putting them out for a week or so and see if anyone wants any? They are £1.50 a card so not too expensive otherwise I have no idea really what to do with them! So for now on the floor in the family room getting in the way! Friends you know what to do ... Give me a shout if you want to play host for a few days to a box/bag of cards for me?

Anyways that was Woyww ... Time for me to head over to the Stamping Ground to see what everyone else is up to.

Posted using BlogPress from my iPad

Tuesday, 24 April 2012

Ribbons anyone?

Over at creative card crew they have a challenge to use ribbons ... Not difficult for me. I have a small addiction to them and whenever I see ribbons I almost always have to get at least a metre to satisfy my urge! I never buy large quantities of the same ribbon as I love to have variety and I also save as many different kinds from various bits and pieces such as old clothes or packaging. Yes I am obsessed! Only problem is my storage for ribbons is appalling so I can never find the exact one I am looking for and what's more I have so many I don't really remember them so often go to the one that jumps out of the drawer!

Ok so my card to co,plate the challenge is another up cycled one but this time I went to a bit of effort in cutting the card blank out and creating an easel card from it...


I used a pale blue card base, and mounted the circular card front piece I had cut on the lower part of the easel. Then inside the card I added the patterned paper. Then as the stopper I added the big button. To finish the top of the card I added the cute flowers and the button centre and of course the ribbon. For this highly patterned card I chose the white patterned flower ribbon as I thought the colour scheme matched and it was a bit out of my comfort zone all these patterns together. But overall ... I like it!

Difficult to see from the pic too ... The topper is glittered too! So even more going on than first meets the eye!


- Posted using BlogPress from my iPad

Monday, 23 April 2012

Scraps and an up cycled card front

Yes another one of those card samples I was kindly given to use is here with a snippet/scrap to help mount it and of course some organza ribbon found in the ribbon pile. And some white enamel accent to make the corner pearls.

I've found myself a new challenge blog called Tuesday throwdown and before it closes in a couple of hours I thought I would enter this card as it qualifies for the recycling challenge.


- Posted using BlogPress from my iPad

Sunday, 22 April 2012

Guess who has reach thirty!

O m g! Thirty people following my blog! I don't know thirty people which means that there are people wanting to follow me and my twittering on about paper who don't even know me! Woo hoo!

This has pleased me no end I can tell you! Thank you very much for reading the drivel and looking at the hopefully pretty things I post here! I'm glad that there's not just me reading this! Lol!

Wonder if my mad obsessive about Christmas other blog will ever get to thirty too ... I doubt it ... Although I know from the challenge blogs I am not on my own for madness about Christmas! Anyway promise to keep the Christmas madness to a minimum here to make up for the never ending Christmas drivel over there!

Anyway once again thank you for following you lovely 30 people!


- Posted using BlogPress from my iPad

Some more up-cycling

A few weeks ago a friend of mine wonderfully thought of me before chucking out some card samples she had from an old business venture ... And after an evening of chopping them up I have ended up with a big pile of things to be made into other cards... Most of these will be gifted on to others to use, and some kept for me but wanted to share a few already made up...


Card one: part of a card chopped up and mounted on the blue card with some silver ribbon and then some enamel and glossy accents added to little features on the dresses.


Card two: part of the same original card as in card one! This time mounted on a panel with a punched edge, then on silver card with a stripe of the lavender and the addition of the pink flower with the jewelled button centre.


Card three: a glossy card this time simply put with some glitter card on a blue card base. I think the beautiful flowers stand on their own and needed very little adornment.


Card four: again from the same card as above but a different part of the floral arrangement this time with the addition of a doily base and some sequinned flowers on a soft blue card blank.


Card five: Well this card has already been given to princess m's grandad. I know it's not a masculine card in anyway but he bought m a NetBook for her birthday so the image was perfect as his thank you card! The original card was just chopped into the smaller image and mounted on patterned pink papers and the ribbon on the front added the final touch. Then mounted on the gold card blank. Not at all Grandad's style but perfect from little princess m!


Nearly there ...


Card six: Again very little needed for this cute image! Mounted it with the organza ribbon and the sentiment panel raised up on pads onto the beautiful scalloped edge card blank, and two gems added ... Job done!

Last one!


Card Seven: this was a simple on again with just some coordinated paper, a doily and some paper flowers on a soft blue card stock. Cute and simple!

Hope you liked a little look around my up cycled cards!


- Posted using BlogPress from my iPad

Wednesday, 18 April 2012

The latest circle journal adventure

This time it was the turn of the beautiful Lynn whose lovely blog you can find here.

Once again I am obsessed with trees but it was a complicated process to get to these trees I can tell you!

I started by putting a layer of tissue paper down as I wanted to play with texture for this journal but first underneath it all was a music score I had in my random pile of old papers.

With the tissue paper I scrunched it up to create the texture and once that was dry I painted roughly over it with a mixture of gesso and a pale peach paint. Then when that was dry added some distress inks swiped over the surface and rubbed in with tissues.

Under the tissue on the right hand side of the page though I had stuck a alcohol inked piece of card which was stamped with the friends stamp which I found in my craft box from a small project I had made at a class and wanted to repurpose... This seemed like the perfect opportunity to do this.

I also decided I liked the look of the sequin stars under the tissue so I added another layer of tissue paper on the top of the sequin stars which helped to blend the square piece in a little more, and added the sequin stars. I must point out at this point I really had no plan at all as to what I was going to do ... I was just playing with textures and the found objects I had come across searching for inspiration. It was a hard journal to work on, as they all are, as they are filled with wonderful pages, and on this occasion my mojo went walkabout!

Anyway I then added some doodles (this always helps me connect to what I am doing!) and added the metal friends charm I found. I also then searched for a quote I could use about friendship and hand wrote that. It was then I discovered writing and drawing on all this texture can be a bit of a nightmare.

To finish this side of the page off I added the trim and ribbon from my stash that seemed to coordinate although I must admit this was the last thing I did!

The other side stared at me for an age as a blank page ... Full of texture and painted roughly in the creamy peach but not really telling me what to do next. But then the tree shape emerged in my head and I wanted to try the doodling type of zentangle so this is what happened!

It is difficult to see in this photo but the tree trunk is painted in a metallic bronze acrylic and the tree ... Well green obviously! Then the green is completely covered in circle doodles which I drew myself over the top. I also added the doodles to the trunk and added the quote which I stumbled across as the start to a poem but now have no idea whose or where! Oops!

As one of the finishing touches I then added the black, charcoal, silver beads which I have loads of from a necklace that was constantly shedding beads all over the place so thought why not add them to my trees.

For the tag I went for texture again! This time with a pattern tissue paper that was not as translucent as the plain white and has a silver a grey stripe pattern. This is still visible through the painting ... Same peachy creamy colour as before.

I chose to do another tree ... Even more tricky as more texture, but this time decided to complicate it a little further and also add some white doodles in the souffle pen over the black pen doodles. I also added the writing around the tree.

On the reverse I added the streaks of the gold/bronze paint, some printed name elements and the buttons ... All 10 of them. Just like there were ten stars on the page, I added ten buttons to represent each of the circle journal group as it turned out that was my theme in some way for the journal pages I was creating for Lynn in thinking about our friendship as a group.

I have to say until the last elements were added I really had no clue if I iked what what I was creating ... But in the end I was pleased with it.

Now I am working on another beautiful journal for the equally beautiful Jayne ... But more about that another time as now it is time for my beauty sleep!

I hope you have enjoyed reading about my creative process for the journals.

Circle journal ... Two months to catch up on

Wow how time flies... Having gone to post about this months journal that has just made its way to the next recipient I've realised I hadn't posted about the one before yet!

So here goes.

The journal belonged to the beautiful Janey and I chose a quote to inspire me and decided to make that the feature for the first half of the journal layout...

As you can see I went orange! Yes very orange indeed! This was created using inks and painting with them, and then adding some larger blobs of ink and letting them run down the page to create the texture in the background. I then used some different lettering techniques to layout the quote from Mary Anne Radmacher using the India ink pens and the white souffle pen. I then added additional texture with the ranger enamel accents in blacks and white.

For the other half of the page I doodled a bare tree on book print and cut it out. I inked it up with some distress inks and stuck it down.

I then added the dot leaves for the tree using the orange, yellow and white acrylic paint.

Finally I added the leaves which are Tim Holtz Tattered Leaves cut out of laminate floor colour samples so have a wood grain to them.

Then I added some writing on the tree, some writing under the leaves and doodled some hearts hanging and the date stamp up the edge.

Now I have a confession to make ... The leaves were not part of the original page but instead were there to cover up an error. I did try to paint a woman under the tree but it went horribly wrong as the acrylics I have got are not great quality and she looked awful on a small scale and I couldn't get her right .... So the leaves connect the too pages with the overlap but were designed to cover the error! As it is I actually really like them so it was a happy thing in the end!

Janey's journal page for me was about my exploration of lettering ... And this continued to the tag!

I doodled the tag with the big Friend and patterned the letters and then added the friend quotes around the edge. The tag itself was also painted brightly with the shocking pink ink this time! The back I used the inks as sprays for a change and sprayed both colours and then stamped the flowers over the back too. Then I added the collection of bright pink, red and orange ribbons through the tag to finish.

So that was the journal page I did for Janey. The next post is all about the pages I did for Lynn.

Tuesday, 17 April 2012

Spring tag swap

Some time ago on a Woyww post the eagle eyed amongst you may have spotted some tags I was in the process of making ... Well I can now post about them as they have been received in Texas.

The rules were the size and that the tags should be pastel and contain at least one layer of patterned paper or stamping etc.

So what did I do?

Well after cutting the cardstock to size I painted the tags with some golden Fish coloured spray ink which is less than pastel! In fact very bright. So then I mixed up some gesso and water and painted over it which toned it down a bit. I then used a stencil to create some marks along the bottom. Then I stamped using the tangerine ink and the flowers from one of my stamp sets from stampin up whose name I don't know as I lost the box!

Then on separate watercolour card I stamped the flowers and leaves as separate items and added some water to give them a watercolour type feel. I then "fussy cut" the flowers and leaves. (this is a new term I've learnt through this process as this is what the swap organiser called the cutting out of an image when describing my tag! I like it!) when they were dry I glued them in the bottom left of the tag with some Pinflar so they had some dimension.

The top left then needed some attention so I stamped one of the butterflies from Papermania Urban stamps onto the watercolour and again water coloured it. I added this to the tag again with pinflair so it was flying off the page.

Where's the bling I then thought ... So I added gold stickles in a swirl for the centre of the raised flower, and the centre line of the butterfly. I also added some clear stickles dots as the trail for the butterfly too. Then finally a layer of glossy accents on the butterfly as I couldn't resist the glassy finish.

Anything I would have done differently? Well probably wouldn't have done the stencilling as it didn't really work and just looks a little like a mark on the background, and maybe rounded the edges of the tags as they look a little severe. But I think for my first ever attempt at this sort of tag swap with rules I did ok. Having seen the video of the tags coming back I am excited to receive my swap as they look fantastic.

And where is the video ... Well you have to join Creating the Crafty Life to see it. My last ATC swap was for there and also doing a Fathers day card swap but more about that in May once the swap is completed.

Friday, 13 April 2012

Welcome to Iceland ... Postcard challenge

As soon as I read Iceland for Darcys postcard challenge for this week I knew my first choice for image would have to be connected to Bjork. It took all week but I finally decided on the album cover for Gling Glo which is a jazz album and the first recording of hers.

Now my version is the best I can do as per usual and not the best ever but decided to stick to a pencil drawing rather than try and do anything else with it.

And the reverse of the postcard ....

Dear Florence
I urge you to take it easy and rest when you need to, please don't put your body under stress not required. Why not put your feet up and listen to some music ... This image on my card from Iceland is a wonderful jazz group I came across whilst travelling here. Most inventive!
Once more I urge you to relax!
Boston

Thursday, 12 April 2012

A quick craft

This weekend it's my parents wedding anniversary so I have made them a card with some of my new cardstock from SU in the In colors. I knew I wanted to use the manhattan rose embossing folder and the new stamp set I got last month on saleabration.

I chose the delicate but bright Pool Party and inked up the embossing folder before putting it through the big shot. Then I cut out the full rose rather than leaving it as a panel. I then decided to choose some creamy yellow card stock from the stash pile and embossed a panel with a swirly star rectangle (no idea where I got this from but certainly don't use it enough!) I then stamped the sentiment in the panel with the pool party and layered it all up with a strip of grosgrain and two flat backed pearl gems to add the different texture.

Fingers crossed this meets the bill and the parents enjoy the creation... I find it hard to create for my family as they ae everything I do and are by far the hardest to impress!

Sunday, 8 April 2012

Cocktail anyone? Postcard challenge

So a few days late... But not before mr linky closed for a change... This week Florence is in Singapore. Immediately that I saw that I knew what I was going to do... The famous Singapore sling from raffles!

Ok my sketch and painting isn't at it's finest but I wanted to get it finished. Annoyingly I also managed to crease the card just before painting ... Ah well it must be damaged by the postman on its long journey! Thats my excuse and I'm sticking to it.

The sketch itself is a copy from google but without the lovely flowers that image had in the background. I pencil sketched and then coloured with watercolours and India ink pen which bled as I was impatient and didn't wait for the paint to dry!

Pretty sure I know what I'm doing for next weeks trip to Iceland so maybe tomorrow I might get that one done on time!


Here is the back...

You are right about listening to my body - this latest jaunt to Singapore is not doing me my good at all. I think I may have to think twice about the longer journeys in future. Maybe I will write to you from home occasionally.
Florence


So maybe having caught up with my story ... Why to pop over to see Darcy's blog and see what all the other travellers are upto! I can promise you there are some amazing stories and creations out there!

Happy Easter from maya

Just had to share Maya's creation from yesterday as my treat to you all for Easter!

ATC transformation into an Easter card

Having made one ATC for myself I figured the best use for it was to make it into a card topper and when I saw that this weeks challenge over at the secret crafters Saturday challenge was Easter I thought this would fit the bill!

So the stamps used etc are in all yesterday's post just added the yellow card and used the corner rounder on the ... Doh ... Corners and added the Easter wishes sentiment.

Happy Easter everyone ... Hope you are all enjoying plenty of chocolates! Diet can start again tomorrow!

Saturday, 7 April 2012

Hop into spring ATC swap

Over a creating the crafty life I've joined in on an Atc swap where the rules are three flowers and pastel. I figured it was a good reason to use the boxing hares stamp from craft stamper mag as I cant think of another reason to use it now the Easter cards are out of the way. So first the background... pool party ink direct onto the acrylic block which gives a lovely mottled effect. Thanks to Helen for this tip.


Then pear pizazz to ink up the split tree clarity stamp and the boxing hares stamp.  Then the blossom mini clarity stamp in the calypso coral.  I then added the three paper flowers, although you might note they dont all have the same combination as I ran out and have no idea where to get more in time... ah well I suppose it makes them all unique in some way!


These have to make their way to the states next week and so I now have to package them up carefully and send them on their way.... but first to make a card for the swap host!


Published with Blogger-droid v2.0.4

Thursday, 5 April 2012

A plethora of Easter cards

Today I am enjoying a girly day off work with the princess. A morning out breakfasting together and wandering the shops, followed by some Easter crafting. I hadn't bothered really tidying up from last night (a treat to myself) as I knew we would get our stamps and stuff out today so there was no point.

Spurred on by last nights I decided to sort out my stamps and get my Easter cards done. Was definitely in a clean and simple mood as evidenced by this little lot...

As I haven't got any specific Easter stamps with the exception of the greeting, I sorted out bunny rabbit stamps, and the Dylusions chicken stamps for something a bit different. Plus I had the cute postage punched bunny which the lovely Mara had stamped for me a few weeks ago to layer up.

I suppose the only different one is the Dylusions one which I just couldn't resist doing some layers for... Just couldn't keep it CAS.

So pleased that Helen brought my Stampin Up order last night as the main purchase was the ink pads ... Most of which feature here ... crumb cake, chocolate chip and Lucky Limeade. Just beautiful and perfect for these Easter cards!

I think my favourite of these is the one with the bunny postage stamp ... I particularly love the textured background stamp I stamped below the punched panel. Thanks Mara once again for the gift of this little stamped punchie!

I am entering these into the craftycardmakers challenge just like the others due to the Easter theme!

Another non traditional Easter card

Another Easter card which is far from traditional but used a lovely technique my lovely crafting friend Helen showed me.

I inked up the acrylic block ... Yes that's right ... The block not a stamp and then placed it down on the card and it created a fab background (wisteria wonder) even with its own border ... How fab is that?

I then used a stamp set I got last month in my massive pile of stuff and hadn't even broken open... simply Soft. It's a lovely selection of floral stems with the double layer. In this case I just stamped the outline in the Concord and added the sentiment in the same colour ink.

I mat this on the handmade paper I have in the scraps box and the purple panel. This is then all mounted on the lovely lilac card

I am entering this into the Craftycardmakers challenge.

Easter cards with a difference

Tonight I had crafting friends round to play and during which there was a fair amount of swapping stamps around and sharing some techniques.

so this first of my Easter cards is a combination of a borrowed stamp from the lovely Mara stamped in chocolate chip ink, and then coloured with the certainly celery stampin write marker Helen lent me. Then it's mounted etc with some scraps including the patterned paper from SU and the lovely seam binding to make this beautiful card which is an Easter card with a difference.

I am entering this into the challenge at Craftycardmakers for Easter.

Turkey postcard

A little late but here is my turkey postcard.

The picture is a hand drawn version of a Turkish tile I found on google images and coloured with blue shades in promarkers. I spotted the distinctive tiles whilst googling and knew immediately this was what I wanted to capture with my postcard. Doing it on time however ... More of an issue!

Good news is however that the next country is well on the way and likely to be finished ahead of time this week!

As for the story ... Here goes!

Florence

I think you ought to listen you your body telling you to slow down although I imagine from what I understand of you is that your fierce independence will make that difficult for you to accept. It is your independence that I admire greatly. I know life is sometimes hard with others not understanding your decision but I promise it will get better for you and the future you will have.

I know in a couple of months time your travelling will become less but I would love it if we could continue to write.

Boston

I really need to do some work on the book housing the cards too as very few are ready and decorated ... Another task to add to the list!

Last bit of news in relation to the postcards ... The lovely Darcy whose challenge this is has a monthly round up of the best cards and twice now I have been long listed which I consider a massive honour considering the talented people who are joining in with her challenge. Please take the time to go and see how everyone's stories and wonderful creations are progressing care of Darcy's blog. And my latest card to be chosen as one of Darcy's favourites is the Netherlands card from a few weeks ago...

Wednesday, 4 April 2012

Woyww

This week at Whats on your workdesk wednesday finds my work desk (aka the dining table) relatively clear at the time I took this picture however tonight will be filled with crafty friends either crafting or chatting and munching and drinking! The only real piece of crafty stuff out is the postcard I finished colouring in over breakfast this morning for Darcy's postcard challenge. I am a week behind at the moment and although the front of the postcard is pretty much done I have yet to write the reverse... Maybe this evening the blog post for this Turkey card will be up and running.


11pm

Yes I am back with another view of my work desk looking slightly more crowded! I was joined by some adorable crafting friends, left to right, Mara, Jackie, Diane and Helen for some chat, craft, nibbles and huge amount more chat!

Thanks for a lovely evening girls! C xxx